
Hi, my name is Angela! I just accepted a new job as an marketing consultant, and I’ve been looking for a simple but unique digital planner to help me get myself ready for the New Year (and new job!) A friend of mine had mentioned LifeAt to me a few months ago - it was a great daily task list with some cool spaces, but I wanted more out of my planner. Well - they did it! I was able to be a part of the beta testers for this planner and they asked me to write a little bit about my experience.
Let’s get started with tags!
Think of tags as virtual filing cabinets for your tasks. Just like in a physical filing system, you can categorize and label each task with tags to keep everything in its proper place. This way, you can easily find what you need, prioritize what's urgent, and stay organized and on top of your responsibilities, all without the clutter and chaos of a messy to-do list.
Creating tags in the Planner is honestly pretty easy. Just click on "Add a new tag," type in a name for your new tag, choose a color and emoji that will help you remember your tasks, and then save it. I created tags to organize my home and hobbies - so, chores, reading goals, meal planning, client consultations, etc.
You can filter your tasks by each tag, giving you a clear view of a specific things to focus on. For me, I like to filter my view by adjusting based on what I’d like to work on - so, when on weekends I only view my “Chores” tag to help me get ahead on cleaning up. This helps you stay organized and on top of your responsibilities without feeling like you're drowning in a sea of tasks.
Next we can work on tasks.
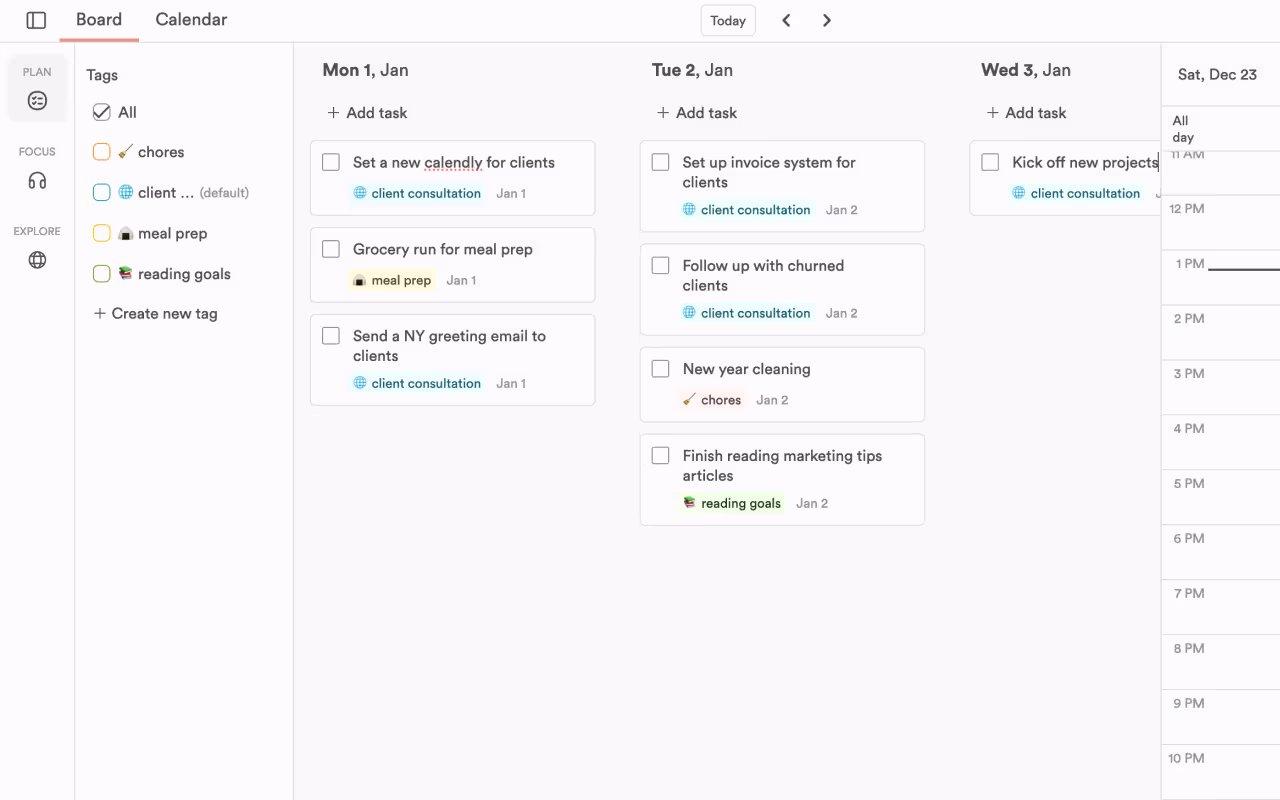
When I want to get ready for the week, I set aside intentional time to plan out my work ahead. I love working in the Board view because I can add tasks directly to each day individually.
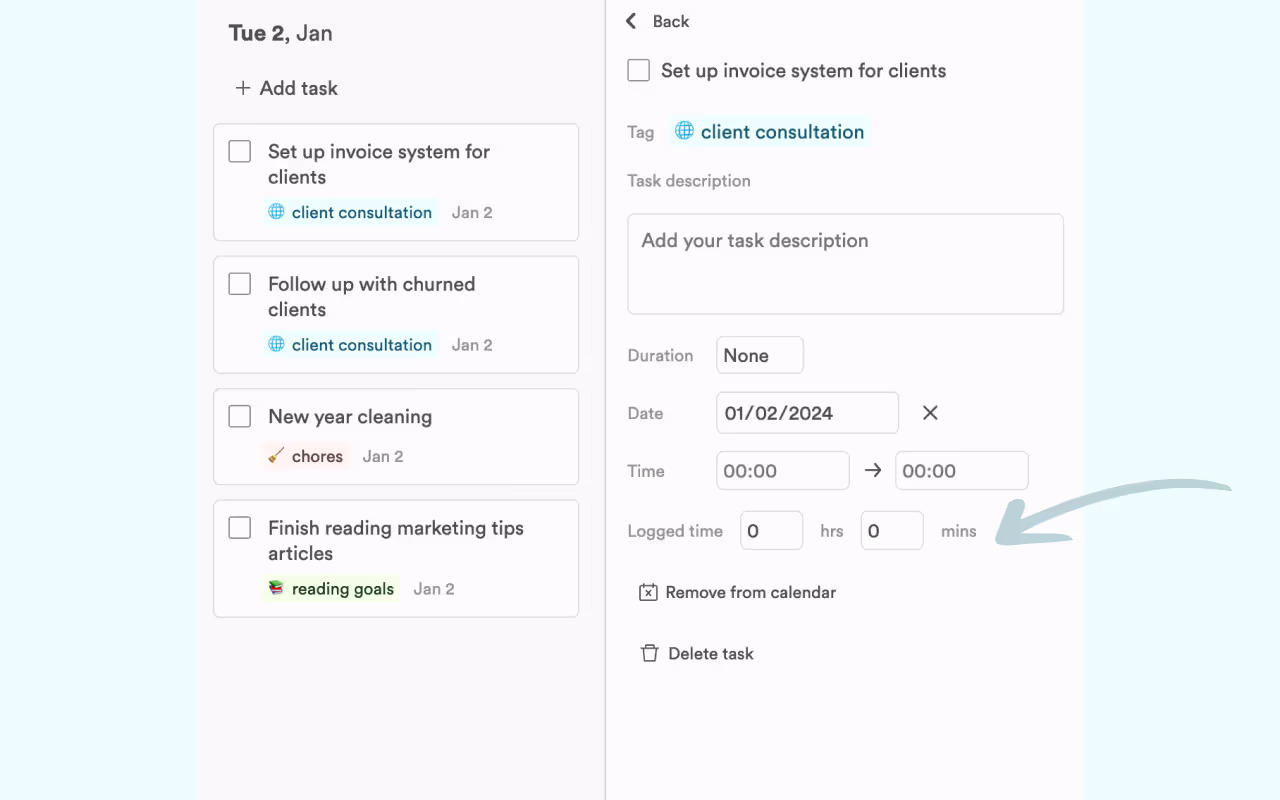
If I need to make changes to a task, I just right-click on the task, choose "edit," and make whatever changes are needed. There’s also a section for “Logged Time” where I can total up how much time I’ve been working on each task.
Have you heard about time-boxing?
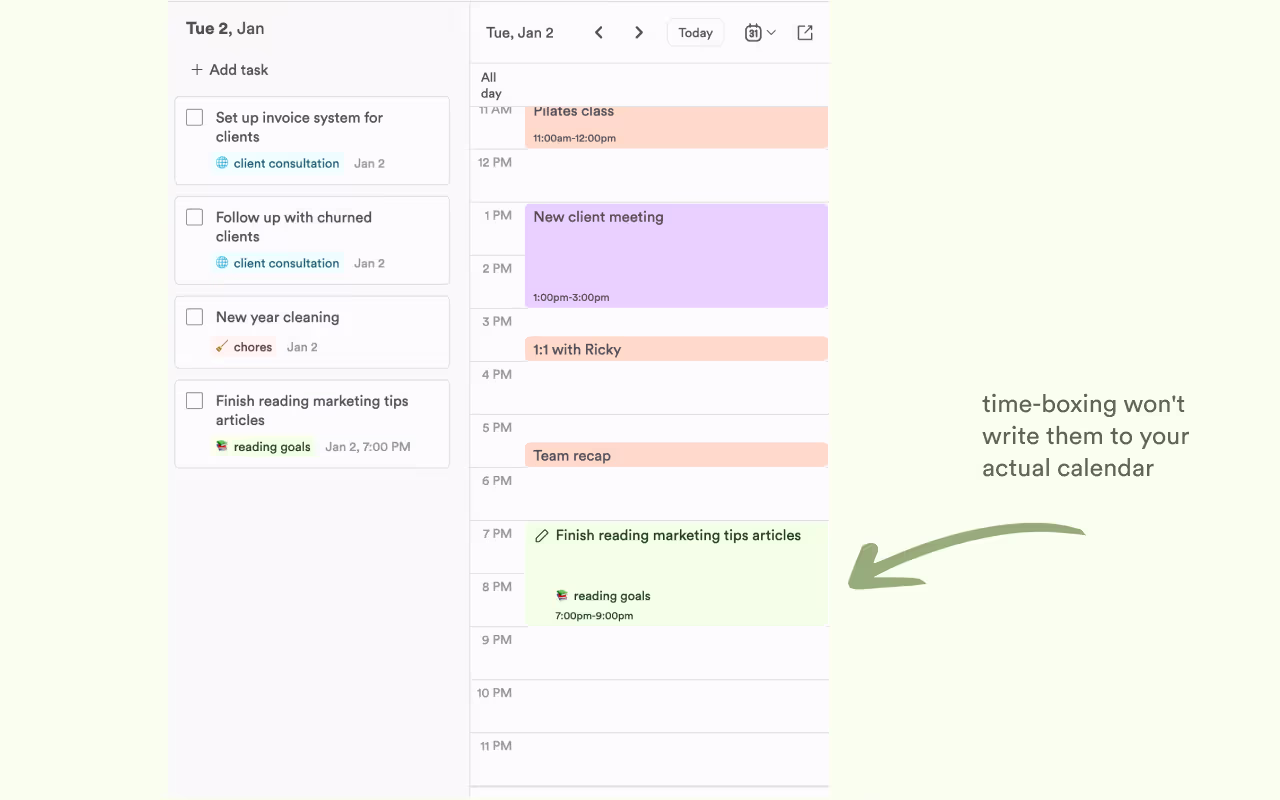
It's a technique that involves setting specific blocks of time for tasks and projects, giving you a structured guide for your day. I usually timebox my tasks by dragging them to into my weekly calendar. This creates a visual of what I have going on with this week’s workload, allowing me to prioritize and get a clear overview of my day.
Plus, don't worry about others seeing your tasks from LifeAt! Dragging and dropping tasks to your calendar won't write them to your actual calendar, keeping your to-do list private and secure. I like being able to write personal to-dos to myself without worrying about what my new job will think!
Changing up your Weekly Views
To close out, let’s review the two views that come with the Planner. On the Board view, you’ll be able to get a linear view of your upcoming tasks, filter your Board by tags, and drag your tasks across days in the event you need to reprioritize your workload. On the right, you have a backlog task menu (the pencil icon) and a single day Calendar view (the calendar icon). Drag your tasks from your day into your Calendar to set some time aside for the task.
Alternatively, there’s also the Calendar view (next to the Board view tab). Click this if you’d like to get a color-blocked view of your upcoming week. On the right side you will be able to view your upcoming tasks as well as add new ones and drop them into your weekly calendar wherever they may fit.
The choice is yours, but my personal favorite is the Board view. I love side-scrolling through my tasks and being able to check things off as I go, rearrange when I need, and get a full scope view of my week.
I hope you’ll love the Planner as much as I do. I feel prepared to tackle my new job, and get organized for the new year.


.avif)


